Showing posts with label 25mm. Show all posts

Sunday, June 23, 2013

Hurry up and wait


It turns out I can paint up a unit of 24 28mm soldiers in about a week, given my hour-a-day schedule.  These Bavarians are now officially awaiting bases.  I'm going to pick up a big pile of Litko bases at Historicon this year, so these pretzel-munchers are just going to have to wait.  In the background, you can see some assembled Perry British, who are going to be the core of my main army.  The detail in the Perry soldiers is staggering and they are far more substantial compared to the Hat Bavarians.  Still, there is something to be said for the mostly pre-assembled Hat figures, speaking as Clumsy McFumblethumbs.

Monday, June 17, 2013

Hide the pretzels! Here come the Bavarians!


Well, it took about a week, but my first unit of 28mm Bavarians is ready for basing.  You can see the second unit in the background, with most of the big color areas blocked in.  These took longer than I anticipated, and they do not allow for the shortcuts I am accustomed to taking in the smaller scales.  ("OK, this little blob of flesh will simulate the hand...")  I decided against spending any time on the faces, but I will try to render good eyes and mouths as I move on to the Perry British I have, where the sculpts seem more inviting.

I can see some areas that could use some improvement, like the collars and surcoats, but on the whole, I am pretty satisfied with my first foray into a new scale.  I still can't get used to the weight of the plastics, and even though I thought I had cleaned of all of the flash, I found lines appearing in areas I thought were clean once I had applied paint.  Some packs that I had applied securely now dangle off their owners' bodies at alarming angles.  But now that they are painted up, I can appreciate the look.  If these Hat figures are bottom of the line as far as hard plastic minis go, I can't wait to try out the Victrix and Perry.

Tuesday, February 12, 2013

Next Caribbean House


My next effort at a stucco house.  This time, the stucco is crumbling away, exposing the brickwork underneath.  I'm going to call this structure the Customs House, with a little storage shed for out back. 

Monday, February 4, 2013

One house does not a village make, but it's a start

Based on some helpful advice I got on TMP, I chose to develop my pirate town with a Spanish colonial feel.  When it is done, the town will have an adobe church, a governor's mansion, a cantina, a Vauban fortress, a few houses, and some sheds.  I thought I would start small by building a prototype house.  

It could not have been easier.  I cut some foamcore for the walls and some matte board for the roofs.  The "tiles" are painted and drybrushed corduroy glued to the roof boards.  I applied epoxy grout to the walls to simulate stucco.  Some brown paint mixed in and a final drybrushing with white provided color.  Them some balsa beams and painted cardstock shutters, and voila!

Total time: about 2 hours.  Total cost: about $3 in materials.  Not bad, says I.

Arrrr...


Saturday, January 19, 2013

First round of scurvy sea dogs

Five 28mm Old Glory pirates to inhabit my brig. I really like how these came out, and they were very easy to paint.  I think I'm getting better at doing faces.


Tuesday, January 15, 2013

Avast, ye scupper mizzens!

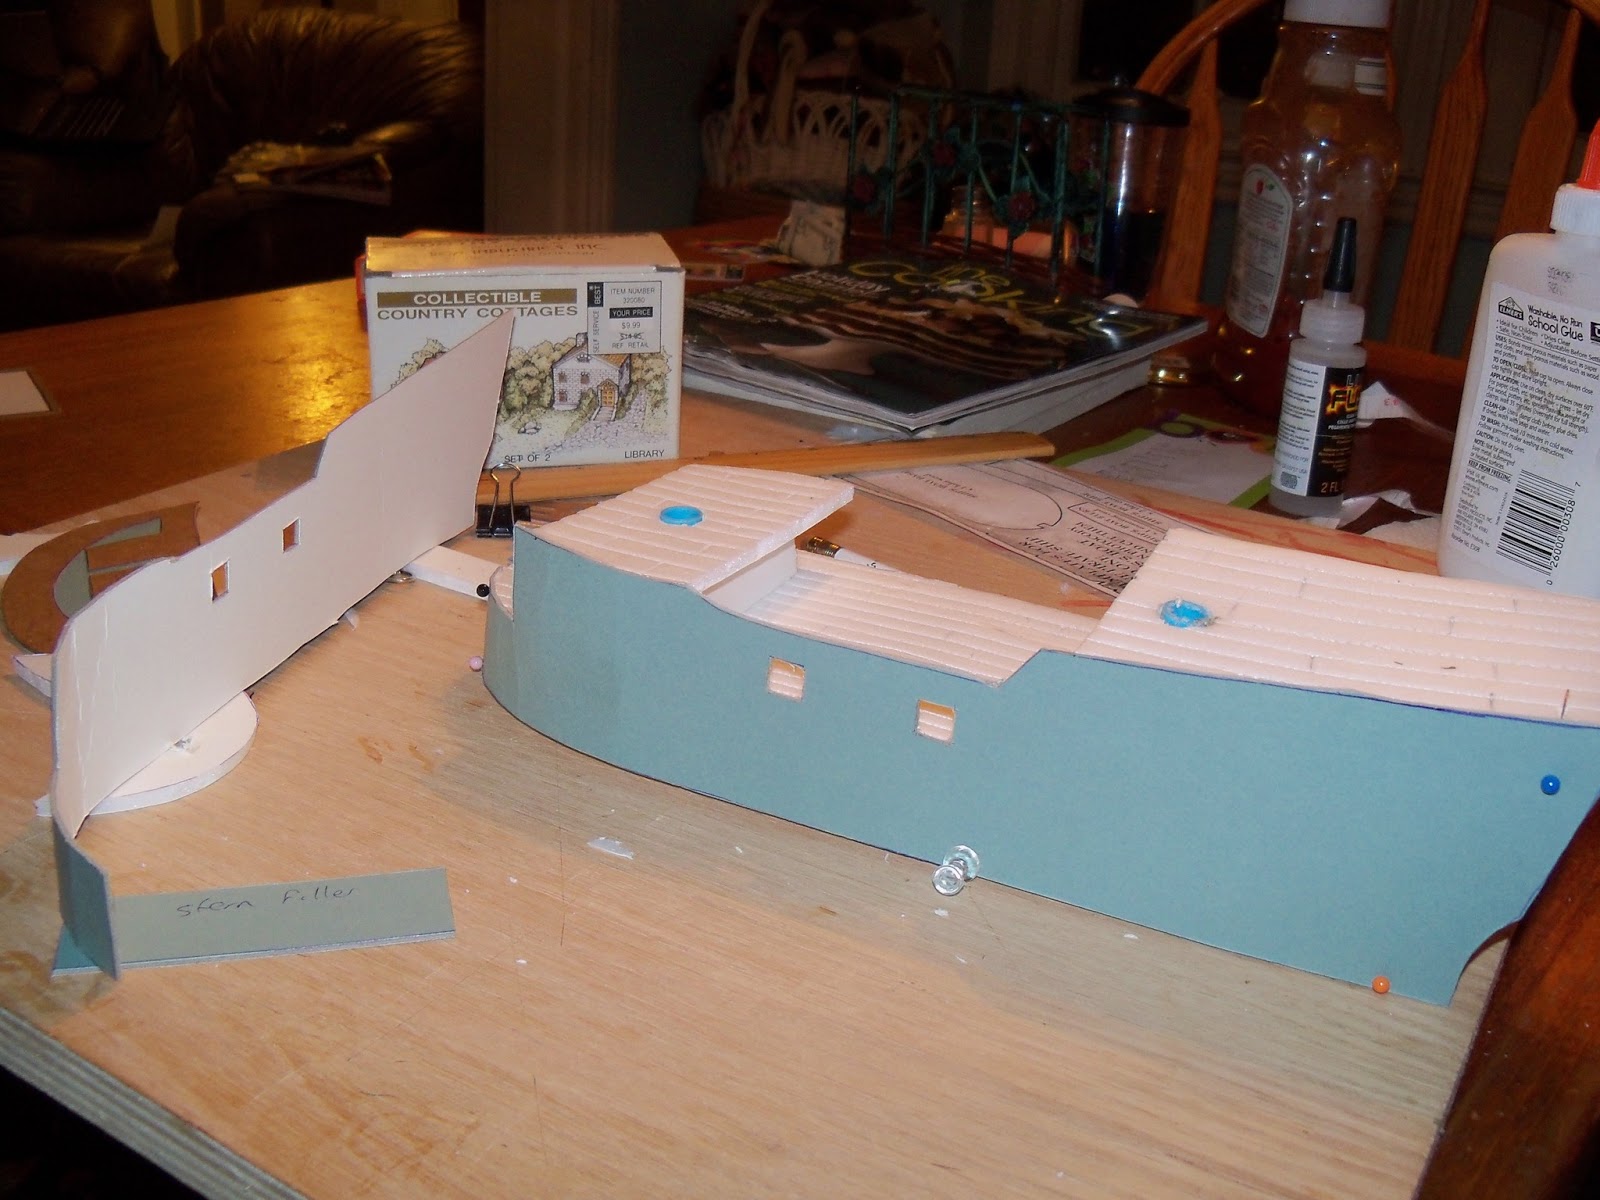
My next project is underway: pirates!  I decided it was time to work in 28mm again, and the golden age of piracy seemed fun and colorful.  Plus, the chance to do some really spectacular terrain (like here and here) appealed to me. Anyhow, I decided to kick off this project with a scratch-built pirate ship using the plans created by Gary Chalk in Wargames Illustrated #38 (March, 1999).  They are no longer on the WI website, but they have been posted to the Pirate Gaming Yahoo Group.

Instead of balsa, I used foamcore as a base.  It's slightly thicker but a heckuva lot easier to work with.  I used matte board (generously donated by my school's art department) for the hull and bulkheads.  This is thicker than Chalk suggests, and it was not easy to cut precisely, but I think the added strength is a plus.

All of the pieces cut and laid out.  This took the better part of two hours!  And two exacto blades.

The decks assembled.  Because foamcore is slightly thicker than the 4mm balsa that Chalk used, I made my deck spacers slightly narrower. To my dismay, the main deck buckled once it was glued in place.  Fortunately, gluing the hull on gave me the opportunity to straighten it out with no subsequent problems.

Putting the hull on.  The matte board could be pretty much shaped to the curves of the hull beforehand, making fastening it in place much easier than I feared it would be.

Flat toothpicks provided woodwork on the bulkheads.  I used cut up magic marker tubes with an interior diameter of .25" as supports for the masts.  This will enable me to take them down for transport.  I used old cereal box for the bow ornament.  Even with the thinner material, it was a bear to cut. However, the plans were so precise that the went into lace almost as if the ship had been made out of molded plastic.

The view from the stern.  It's not clear from the plans, but the stern requires two pieces cut from the template.  One has the windows cut out of it, creating a inset area around the galley.  It adds just the right piratey touch.


And here's the painted hull.  I made a little dinghy, too. The dinghy took about an hour to make, including paint.  The whole ship took me from Saturday morning to Tuesday evening, working no more than an hour or two a day.  Honestly, cutting out the pieces was the hard part.

I screwed up the deck by peeling the outer paper off the foamcore.  I've had issues with buckling when I've painted foamcore in the past.  I thought that I could get away with using a light dusting of spray primer before applying the base coat of paint.  Wrong.  Never ever use any kind of spray paint on foam.  Ever.  My decks look more like gravel than planks now.  The drybrushing hides some of the damage, but I am still kicking myself.


The view from the stern.  I named her the Alice, after my cat.  I have two kids, and they'll just have to wait to have boats named after them. Or they can make them themselves.  I'm terrible at any kind of scratch building, but I'm pretty happy with how the Alice turned out. I think she'll make a fine addition to my wargaming table.

Next up: some pirate minis and a Vauban fort!

Tuesday, July 26, 2011

Yippee Ki Yi Yay!


Well, I've been dropping hints for some months now that I'm working on an Old Western project. I've been wanting to do a 19th century skirmish wargame for a long time now. I considered the British colonial wars, especially the Zulu War, having fond memories of playing the Sword and the Flame a few decades ago. I thought maybe the American Civil War, the Boxer Rebellion, and even the Napoleonic era (there's a well-reviewed set of rules called Sharp Practice). But, shoot, I'm an American, and though I'm East Coast elite through and through, the Old West still looms large in my cultural imagination. I grew up watching The Magnificent Seven, High Noon, and Rio Bravo on UHF. So Old West it was going to be.

I looked at about a half dozen rules sets. "Gutshot" and "Cowboy Wars" both had a lot to recommend it. But I was looking for simple, fast, and bloody. Fortunately, I picked up a copy of "Fistful of Lead" at Historicon. The rules cover about four pages, they use a deck of playing cards, and they look like fun. Boom. All three of my criteria met. I'm thinking about some house rules (like holding an action and giving gunfighters different ratings for Shootin', Fightin' and Guts), but I don't want to lose too much of the elegant simplicity.

I found a sheet of insulating foam about 8'x2' in the trash of a construction site. Using a foam cutter I sculpted some hills, painted everything light brown, then scattered sand into the wet paint. Total cost so far, about $1 for craft store acrylic paint. The sand I got from my daughter's shoes. She brings home a fistful of sand after school every day. I've been saving it.

I picked up three resin buildings from the Old Glory booth at Historicon. With my 40% discount, all three wound up being $42. I then sculpted two more houses out of balsa wood, foam core, and Starbucks coffee stirrers. I also made some adobe huts out of foamcore ($1 a sheet at the Dollar Store) and bamboo skewers. Then, some cacti from Pegasus models and I'm ready to go. Total cost, under $50.

The figures are all Old Glory. The Mexicans are Zapataistas, but they can double for banditos when they're in a less revolutionary mood. The gunfighters are also from the Old Glory "American Experience" line. It took a little practice to get back into painting 28mm figures after doing 10mm for so long. I'm working on my techniques for painting eyes, shading, and sculpting bases. I've even begun adding tufts of tall grass to some bases.

As always, click to enlarge the photos.

First, two long shots of the table.


Here is El Gato Gordo and his band of ruffians in the adobe village. One shot used the flash, the other didn't.


Here's a wide shot of the town.


Here's Clint and the Airedale Gang. If you've ever met an Airedale Terrier, you just know they're tough.


The building in the right foreground and the grey one with blue trim are my scratch-built houses.

My kids think the outhouse is funny.

Finally, we have Duke and the Scruffy Bunch. If one gang was going to be named after a former dog, then the other would have to be named after a former cat.

Monday, February 7, 2011

Yippie ki yay!

So I've decided to write my own rules for an Old West skirmish game. I wanted one where gunfighters could shoot it out, and one in which a tiny band of shootists could tate on an army of Mexican banditos like in The Magnficent Seven. I'll post those rules here when I've completed a draft I'm happy with.

In the meanwhile, I've painted up my first batch of figures, enough for a moderate-sized shootout. The cowboys are "Cowboy Wars," and the banditos are 'Villa Expedition Mexicans' from Old Glory.

I'm testing out the camera on my Droid. The photo quality could be better--I'll keep experimenting.


From Drop Box


From Drop Box


From Drop Box